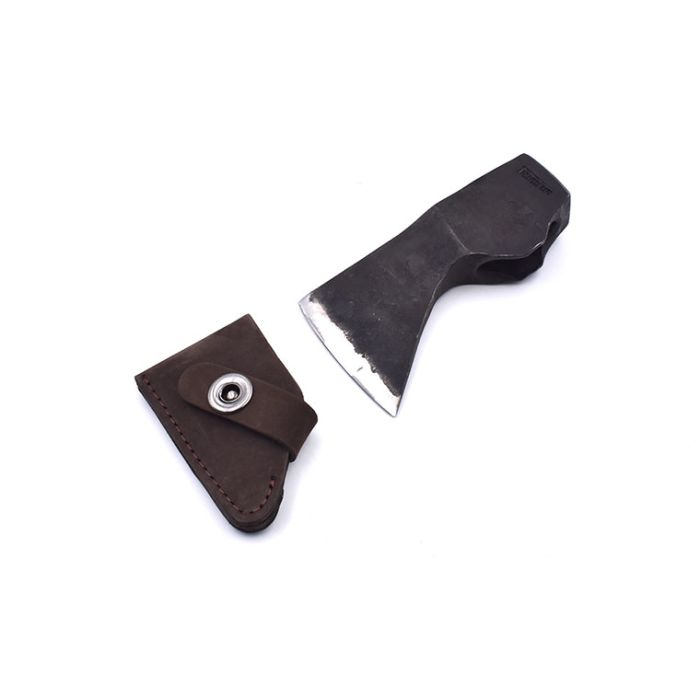
Axe Head AX1

In stock
- SKU
- 66716
Description / Axe Head AX1
The BeaverCraft hand-forged bushcraft axe hatchet head is a high-quality, handcrafted tool designed for durability and precision. Ideal for bushcraft and outdoor activities, it features a sharp, durable edge and a robust design, making it perfect for chopping, carving, and other woodcraft tasks. Each axe head is individually forged from premium steel, ensuring a unique and reliable product for all your wilderness adventures.
- Head length – 140 mm (5.51 inches)
- Blade width – 75 mm (2.95 inches)
- Steel material – 1066 Carbon, 56-58 HRC
- Grind type – Convex
- Sheath material – Cowhide leather
Assembling the BeaverCraft Axe Hatchet Head to your own crafted handle involves several steps to ensure a secure and functional fit. Here's a step-by-step guide:
Materials Needed:
- BeaverCraft Axe Hatchet Head
- Crafted wooden handle
- Wood rasp or file
- Sandpaper
- Saw
- Epoxy glue (optional)
- Wooden wedge
- Metal wedge (optional)
- Hammer
- Boiled linseed oil or wood finish
Steps:
-
Prepare the Handle:
- Ensure your handle is properly shaped and smoothed to fit the axe head.
- The end of the handle (the eye section) should be slightly oversized for the axe head opening.
-
Fit the Axe Head:
- Slide the axe head onto the handle from the top, ensuring it fits snugly.
- Mark the position where the axe head sits securely.
-
Shaping the Handle:
- Use a wood rasp or file to carefully shape the top of the handle, ensuring a tight fit within the axe head.
- Continuously check the fit by sliding the axe head on and off until it fits perfectly without excessive force.
-
Cutting the Kerf:
- Saw a vertical slot (kerf) into the top of the handle where the axe head sits. This slot will hold the wooden wedge.
-
Attaching the Axe Head:
- Apply epoxy glue to the top of the handle for extra security (optional).
- Slide the axe head onto the handle until it fits snugly against the shoulder.
-
Inserting the Wooden Wedge:
- Insert a wooden wedge into the kerf you cut earlier.
- Use a hammer to drive the wedge in, expanding the handle to secure the axe head firmly.
-
Securing with Metal Wedge (Optional):
- For additional security, you can drive a metal wedge perpendicular to the wooden wedge.
-
Finishing Touches:
- Trim off any excess wood protruding from the top of the axe head.
- Sand the top smooth and apply boiled linseed oil or your preferred wood finish to protect the handle and enhance durability.
Tips:
- Ensure all components fit tightly to avoid any wobbling.
- Regularly check the axe head for looseness, especially after heavy use, and re-tighten if necessary.
- Safety first: Always wear protective gear when handling tools and performing these tasks.
By following these steps, you can securely assemble your BeaverCraft Axe Hatchet Head to your custom handle, ensuring a reliable and long-lasting tool for your bushcraft activities.
More Information
| Made in | Ukraine |
|---|

